In this article, we’ll walk through the implementation of a one-dimensional, binary-state cellular automaton built on top of the parametric CA framework I introduced in a previous post. The single-page app is split into two pieces: the cellular-automaton engine itself, and a graphical user interface (GUI). The GUI includes two renderers—one for the rule and one for the grid. The engine lives in TypeScript, while the UI is built with Svelte, with each component’s behavior also written in TypeScript. Both the rule renderer and grid renderer are powered by PixiJS, again using TypeScript under the hood. Development and builds are handled with Vite, while Vitest takes care of the unit tests.
The Cellular Automaton Engine
TypeScript’s powerful type system—especially its generics—lets the CA engine stay both flexible and intuitive. By parameterizing key types, we can define polymorphic interfaces, classes, and functions without losing type safety. Every concrete automaton simply implements the CellularAutomaton interface shown below.
/* * Interface for cellular automata with arbitrary dimensionality and cell state values.
 */
export interface CellularAutomaton<
  T extends CellState,
  U extends CellLocation,
  V extends CellPopulation<T, U>
> {
  /**
   * Evolves <seedPopulation> for <generationCount> generations.
   */
  evolve(seedPopulation: V, generationCount: number): V[];
  /**
   * Calculates the next generation from <pop>.
   * @param pop
   */
  nextGeneration(pop: V): V;
}
One-dimensional automata are represented by the CellularAutomaton1D class. Because the cell state is supplied as a type parameter, it can be any type you choose.
/**
 * A generic one-dimensional automaton that allows arbitrary cell state values.
 */
export class CellularAutomaton1D<
  T extends CellState,
  U extends EvolutionRules<T, CellNeighborhood1D<T>>
> implements CellularAutomaton<T, CellLocation1D, CellPopulation1D<T>>
{
  constructor(private readonly rules: U) {}
  ...
However, each automaton expects its rule set to be injected as an immutable EvolutionRules property. The evolve() method takes a seed population and repeatedly applies the automaton’s rules for the requested number of iterations, returning every intermediate generation along the way. Under the hood, it simply loops over nextGeneration(), collecting each result as shown below.
/**
   *
   * @inheritdoc
   */
  evolve(
    seedPopulation: CellPopulation1D<T>,
    generationCount: number
  ): CellPopulation1D<T>[] {
    assert(
      Number.isInteger(generationCount) && generationCount > 0,
      `Invalid generation count ${generationCount}`
    );
    const generations = [seedPopulation];
    let currentGen = seedPopulation;
    for (let i = 0; i < generationCount; i++) {
      currentGen = this.nextGeneration(currentGen);
      generations.push(currentGen);
    }
    return generations;
  }
Thanks to the CellNeighborhood1D and EvolutionRules abstractions—plus a simple location iterator—nextGeneration() stays concise and readable. It walks through every cell location in the current population, extracts that cell’s neighborhood, feeds the neighborhood into the rule, and writes the resulting state into the next-generation.
nextGeneration(currentGen: CellPopulation1D<T>): CellPopulation1D<T> {
    const nextGen = currentGen.clone();
    for (let cellLoc of currentGen.locations()) {
      const cellNeighborhood = currentGen.getCellNeighborhood(cellLoc);
      const nextCell = this.rules.apply(cellNeighborhood);
      nextGen.setCellAtLocation(cellLoc, nextCell);
    }
    return nextGen;
  }
We’ll wrap up this section by examining the EvolutionRules interface and its concrete implementation, RulesBin1D, which encodes the classic 8-bit rule set for one-dimensional, binary-state automata.
import { CellNeighborhood, CellNeighborhood1D } from "./cell-neighborhood";
import { BinaryState, CellState } from "./cell-state";
import { Cell } from "./cell";
import { assert } from "../utils/assert";
/**
 * Set of automata evolution rules.
 */
export interface EvolutionRules<
  T extends CellState,
  U extends CellNeighborhood<T>
> {
  apply(neighborhood: U): Cell<T>;
}
export type EightBinStateTuple = [
  BinaryState,
  BinaryState,
  BinaryState,
  BinaryState,
  BinaryState,
  BinaryState,
  BinaryState,
  BinaryState
];
/**
 * Evolution rules for a one-dimensional automaton where cells take binary states: DEAD | ALIVE.
 */
export class RulesBin1D
  implements EvolutionRules<BinaryState, CellNeighborhood1D<BinaryState>>
{
  /**
   * Encoded automata rules: e.g rules[3] = ALIVE means if neighbohood A D A, then the next state of middle cell is A.
   */
  private readonly rules: EightBinStateTuple;
  /**
   *
   * @param rulesCode Code of this rules set between 0 and 255. This code defines the one-dimensional
   * cellular automata following Wolfram's notation: R0, R30, R121...
   */
  constructor(rulesCode: number) {
    assert(
      Number.isInteger(rulesCode) && rulesCode >= 0 && rulesCode < 256,
      `Invalid ${rulesCode}, value must be an integer in [0, 255]`
    );
    const binaryCode = rulesCode.toString(2).padStart(8, "0");
    // Wolfram convention: binaryCode[0] is MSB ("111")…binaryCode[7] is LSB ("000").
    // reverse() makes rules[0] ↔ "000", rules[7] ↔ "111".
    this.rules = binaryCode
      .split("")
      .map((bit: string) => {
        return bit == "0" ? BinaryState.DEAD : BinaryState.ALIVE;
      }).reverse() as EightBinStateTuple;
  }
  apply(neighborhood: CellNeighborhood1D<BinaryState>): Cell<BinaryState> {
    const ruleIdx = this.neighborhoodToRuleIdx(neighborhood);
    return new Cell(this.rules[ruleIdx]);
  }
  private neighborhoodToRuleIdx(
    neighborhood: CellNeighborhood1D<BinaryState>
  ): number {
    const [left, center, right] = neighborhood.cells.map((cell) =>
      cell.state == BinaryState.DEAD ? 0 : 1
    );
    const ruleIdx = right + center * 2 + left * 4;
    return ruleIdx;
  }
}
Each rule is stored as an 8-bit tuple. The RulesBin1D constructor takes a rule code—an integer from 0 to 255—and decodes it into that eight-bit tuple for easy lookup during evolution.
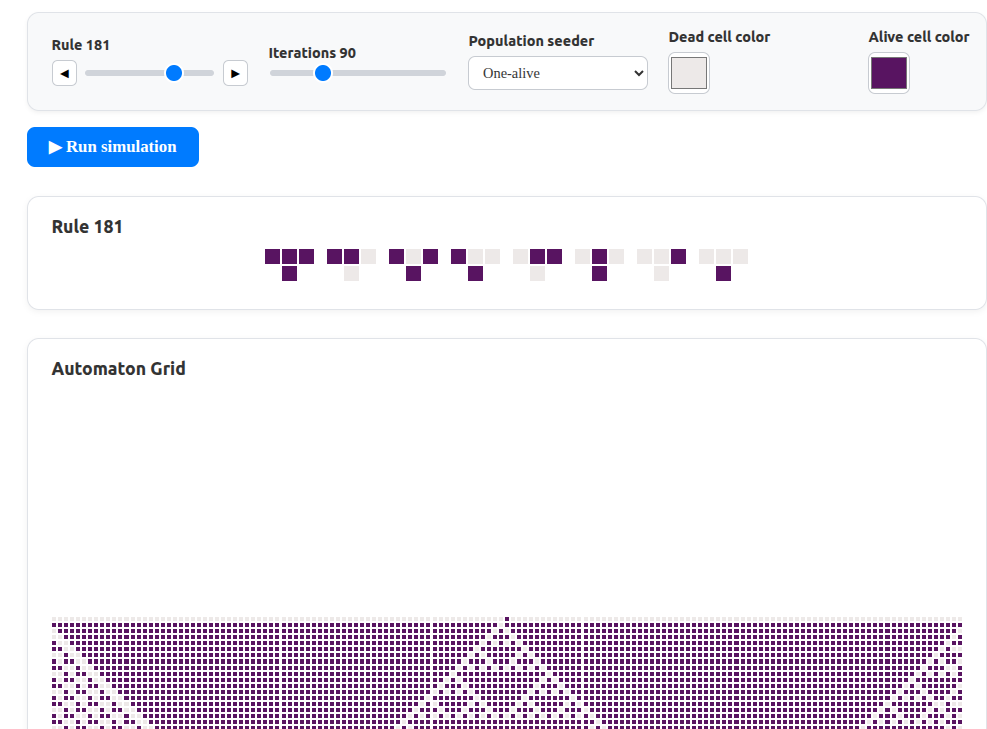
The Graphic User Interface
The graphical user interface is built from four Svelte components: the root App component and three reactive children—ControlPanel, AutomatonRule, and AutomatonGrid. The rest of this section offers a concise walkthrough of how each component is built and wired together.
App Component
This root component defines the application-wide state, including both the configuration settings and the current automaton grid.
let ruleCode = $state(165);
let iterationCount = $state(90);
let colorDead = $state("#ede9e8");
let colorAlive = $state("#142661");
let seeder = $state("One-alive");
let grid = $state<Array<Array<boolean>>>([]);
Because simulating a CA can be computationally expensive, the user must start it manually rather than having it launch automatically whenever a configuration variable changes. The run_simulation function handles this: it creates a fresh set of evolution rules, seeds the initial population, instantiates the cellular automaton, and then evolves it for the specified number of iterations.
function runSimulation() {
  grid = [];
  const rules = new RulesBin1D(ruleCode);
  const seedPopulation = createSeedPopulation();
  const automaton = new CellularAutomaton1D(rules);
  const generations = automaton.evolve(seedPopulation, iterationCount);
  grid = generations.map((gn) => toBooleanArray(gn));
 }
The App markup declares three child components—the control panel, the CA-rule renderer, and the CA grid—and includes a button to start the simulation.
<ControlPanel
    bind:ruleCode
    bind:iterationCount
    bind:colorDead
    bind:colorAlive
    bind:seeder
  />
  <button class="run-btn" onclick={runSimulation}>▶︎ Run simulation</button>
  <AutomatonRule {ruleCode} {colorAlive} {colorDead} />
  <AutomatonGrid {colorDead} {colorAlive} {grid} />
The ControlPanel properties are bound bidirectionally, allowing configuration settings to flow both into and out of the component. The runSimulation function is wired as the click handler for the Run Simulation button, while the renderer components use one-way bindings.
ControlPanel Component
The panel deconstructs its properties into bindable fields, and its markup uses standard HTML.
let {
    ruleCode = $bindable<number>(),
    iterationCount = $bindable<number>(),
    seeder = $bindable<
      "One-alive" | "All-alive" | "All-dead" | "Alternating" | "Random"
    >("One-alive"),
    colorDead = $bindable<string>(),
    colorAlive = $bindable<string>(),
  } = $props();
  const clamp = (n: number) => Math.max(0, Math.min(255, n));
AutomatonRule Component
This component renders a cellular-automaton rule from its numeric code. Under the hood, it relies on PixiJS. A PixiJS application is created and initialized when Svelte mounts the AutomatonRule component. Because that setup is asynchronous, a pixiReady flag signals when the PixiJS app is ready, preventing race conditions between PixiJS and Svelte.
onMount(async () => {
    pixi = new Application();
    await pixi.init({ background: "#fff", resizeTo: host });
    host.appendChild(pixi.canvas);
    gridContainer = new Container();
    pixi.stage.addChild(gridContainer);
    pixiReady = true;
  });
We use Svelte’s $effect rune to make the component reactive: it redraws the rule whenever its numeric code changes or whenever the alive/dead cell colors are modified. The dummy assignments in the implementation force Svelte to read these properties and register them as dependencies for the $effect rune, ensuring reactivity.
$effect(() => {
    if (!pixiReady) return;
    const code = ruleCode;
    const alive = colorAlive;
    const dead = colorDead;
    drawRule(code, dead, alive);
  });
The numeric rule code is first converted to its binary representation. We then draw the eight possible neighborhoods—and the resulting state dictated by the rule—using PixiJS rectangles.
function drawRule(code: number, dead: string, alive: string) {
function toColor(bit: number): number {
return toHex(bit ? alive : dead);
}
const cellSize = 15;
const cellPadding = 2;
const neighborhoodWidth = 3 * cellSize + 2 * cellPadding;
const neighborhoodPadding = 13;
const ruleWidth = 8 * neighborhoodWidth + 7 * neighborhoodPadding;
const xOffset = (pixi.screen.width - ruleWidth) / 2;
const maxX = xOffset + 7 * (neighborhoodWidth + neighborhoodPadding);
gfx.clear();
for (let i = 0; i < 8; i++) {
const cellState = (code >> i) & 1;
// Convert i to a neighborhood
const rightNeighbor = i & 1;
const center = (i >> 1) & 1;
const leftNeighbor = (i >> 2) & 1;
// Draw neighborhood
const x = maxX - i * (neighborhoodWidth + neighborhoodPadding);
const y = 0;
gfx
.rect(x, y, cellSize, cellSize)
.fill(toColor(leftNeighbor));
gfx
.rect(x + cellPadding + cellSize, y, cellSize, cellSize)
.fill(toColor(center));
gfx
.rect(x + 2 * (cellPadding + cellSize), y, cellSize, cellSize)
.fill(toColor(rightNeighbor));
gfx
.rect(
x + cellSize + cellPadding,
y + cellSize + cellPadding,
cellSize,
cellSize
)
.fill(toColor(cellState));
}
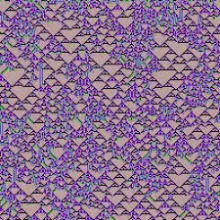
} AutomatonGrid Component
This component renders every generation of the cellular automaton as a stacked grid. Like AutomatonRule, it relies on PixiJS. The PixiJS application is set up in the onMount lifecycle hook, and a $effect rune keeps the grid reactive—redrawing it whenever the alive or dead cell colors change.
$effect(() => {
    if (!pixiReady) return;
    const updatedGrid = grid;
    const aliveColor = colorAlive;
    const deadColor = colorDead;
    renderGrid(updatedGrid);
  });
Class Grid is used to describe a CA grid.
 class Grid {
    public readonly rowsCount: number;
    public readonly columnsCount: number;
    public readonly cellSize: number;
    public readonly padding: number = 2;
    public readonly width: number;
    public readonly height: number;
    public readonly leftMargin: number;
    public readonly topMargin: number;
    constructor(
      rowsCount: number,
      columnsCount: number,
      containerWidth: number,
      containerHeight: number
    ) {
      this.rowsCount = rowsCount;
      this.columnsCount = columnsCount;
      const cellWidth = Math.floor(
        (containerWidth - (columnsCount - 1) * this.padding) / columnsCount
      );
      const cellHeight = Math.floor(
        (containerHeight - (rowsCount - 1) * this.padding) / rowsCount
      );
      this.cellSize = Math.min(cellHeight, cellWidth);
      this.width =
        this.columnsCount * this.cellSize +
        (this.columnsCount - 1) * this.padding;
      this.height =
        this.rowsCount * this.cellSize + (this.rowsCount - 1) * this.padding;
      this.leftMargin = Math.max(0, (containerWidth - this.width) / 2);
      this.topMargin = Math.max(0, (containerHeight - this.height) / 2);
    }
  }
We use lightweight PixiJS sprites—rather than rectangles—to draw the grid. The code snippet below illustrates this process.
function createGridCell(rowIdx: number, colIdx: number, grid: Grid): Sprite {
    const cell = new Sprite(Texture.WHITE);
    cell.anchor.set(0, 0);
    const cellOffset = grid.cellSize + grid.padding;
    cell.position.set(colIdx * cellOffset, rowIdx * cellOffset);
    cell.scale.set(grid.cellSize, grid.cellSize);
    cell.tint = 0x444444;
    return cell;
  }
  function renderGridCells(cells: Sprite[], states: Boolean[]) {
    for (let i = 0; i < cells.length; i++) {
      cells[i].tint = getTint(states[i]);
    }
  }
  /**
   * Returns the proper tint for a given cell state.
   */
  function getTint(isAlive: Boolean): string {
    return isAlive ? colorAlive : colorDead;
  }
Summary
In this article, we explored how to implement a one-dimensional, binary-state cellular automaton. Our parametric design yielded reusable components that simplified development, and the combination of Svelte with PixiJS enabled a reactive graphical user interface.
The next step is to apply this same parametric design to build a two-dimensional, binary-state automaton.